
to this blog to receive future updates!
In this article I will be laying out a step-by-step tutorial for building a task manager app using the MERN Stack. I will also be implementing global state using the Redux toolkit, creating HTTP requests using Axios, and styling the site using TailwindCSS. As a finishing touch, I will implement conditional rendering that changes the color scheme of the task based on the progress towards completion. And, finally, I will show you how to deploy the app to Heroku.
The source code for this project can be found here.
What is the MERN Stack ?
M - MongoDB, a NoSQL database that is available open source. It is highly scalable and flexible and allows for easy query implementation.
E - Express, a Node.js framework used to write server-side logic for web and mobile applications.
R - React, a front-end JavaScript library for building the UI for a web application
N - Node.js, an open source server environment for executing JavaScript code server-side.
In terms of full-stack development, MongoDB serves as the backend of the application, React is used to build out the frontend of the application, and Express and Node.js build out the server in between.
To Begin
This tutorial will be using VS Code which can be installed here.
You will also need to install nodemon as a global package by typing npm install -g nodemon in the command line.
After doing these installations, the first step will be to create a folder for your application.
Navigate to the location where you would like to store your application and create a folder called "my-task-manager" or any name of your choice.
Open a command line or Windows PowerShell, navigate to this new folder and type code .
Note the space and the '.' after the word 'code'. You need to type those also.
From VSCode, open a new terminal and type npm init. This will create new package.json and package-lock.json files.
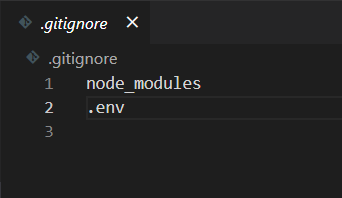
You can also type git init to initialize an empty git repository and create a ".gitignore" file.
In the ".gitignore" file add node modules and .env on separate lines.
It should look like this:
The next step is to install the backend dependencies.
In the terminal type
npm install axios bcryptjs dotenv express express-async-handler http-proxy-middleware jsonwebtoken mongooseor
yarn install axios bcryptjs dotenv express express-async-handler http-proxy-middleware jsonwebtoken mongooseYou will also need to install two devDependencies, which are dependencies that will only be used during development.
Type the following into the terminal (note the -D in the command):
npm install -D concurrently nodemonor
yarn install -D concurrently nodemonThe next step is to create our environment variables in the .env file but first we will create our MongoDB Database using MongoDB Atlas.
MongoDB Atlas
If you don't already have an account with MongoDB Atlas, you can sign up for one here.
After signing in, click the button for New Project.
Give the project a name and click Next.
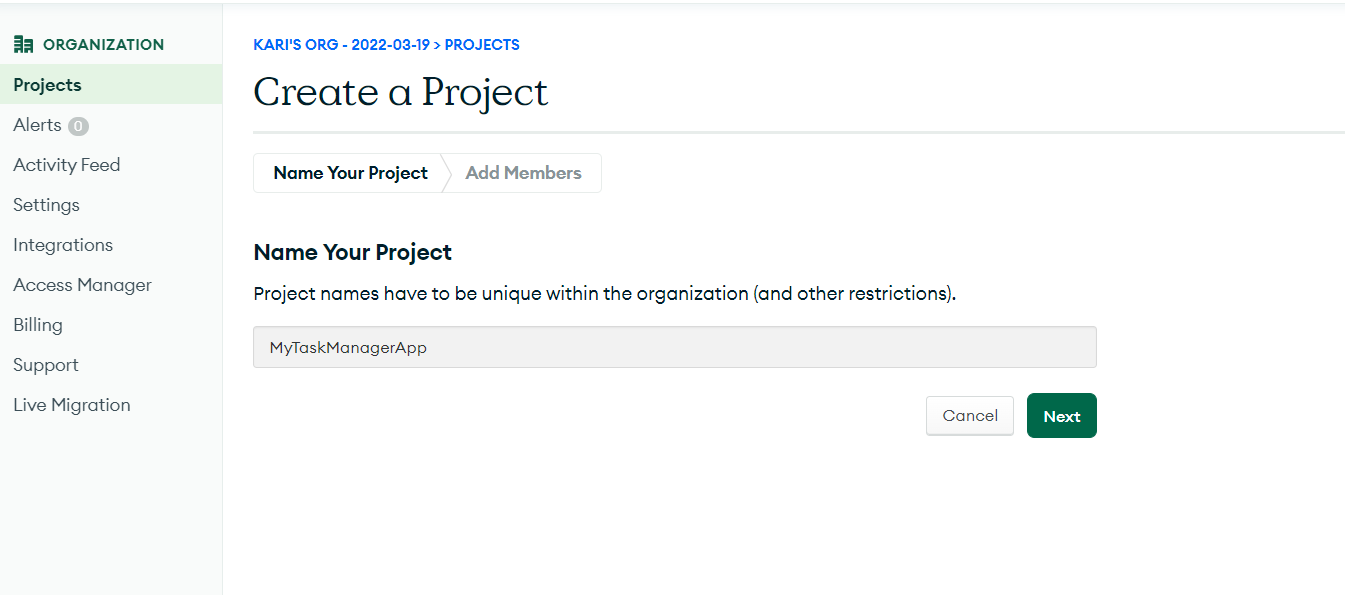
Click Create Project on the next screen.
The next screen will be the Database Deployment screen. Click Build a Database.
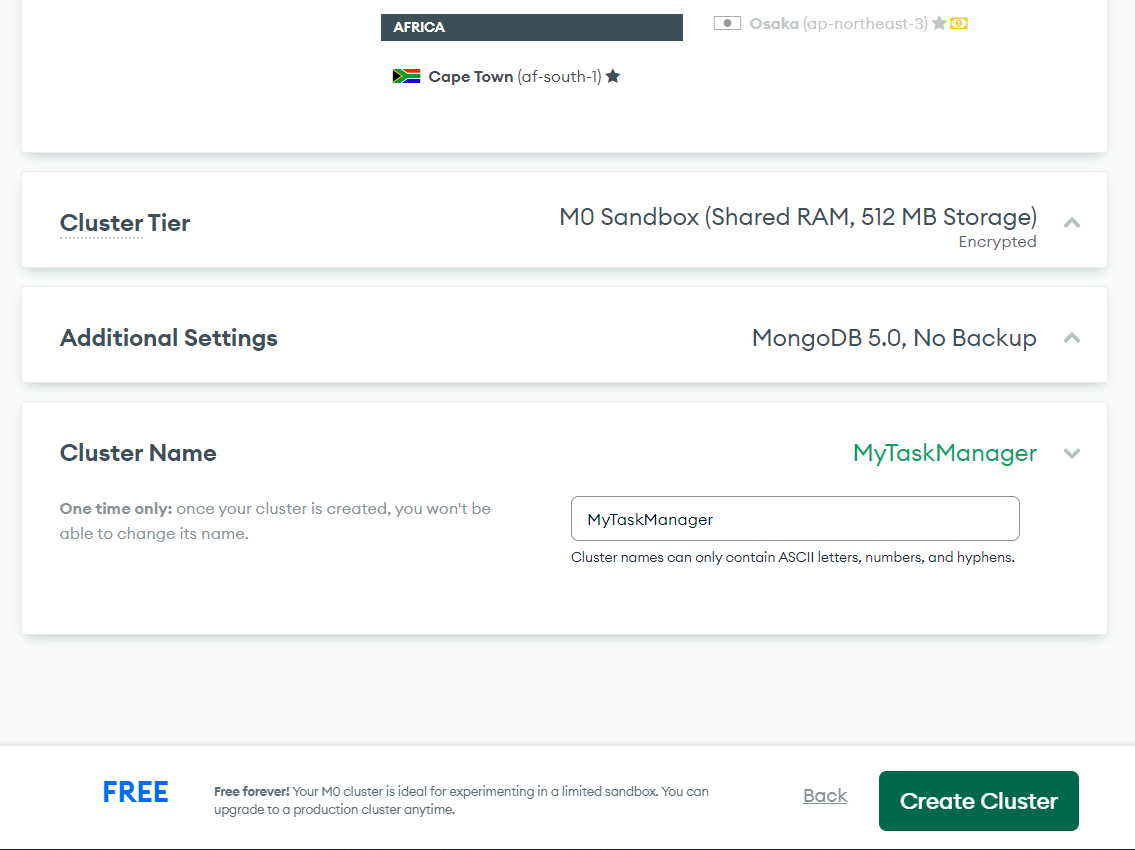
Select the free tier and then choose a provider and region. You're selections here don't matter that much but you will want to select the closest region to you.
Scroll to the bottom of the screen and enter a cluster name. Then click Create Cluster.
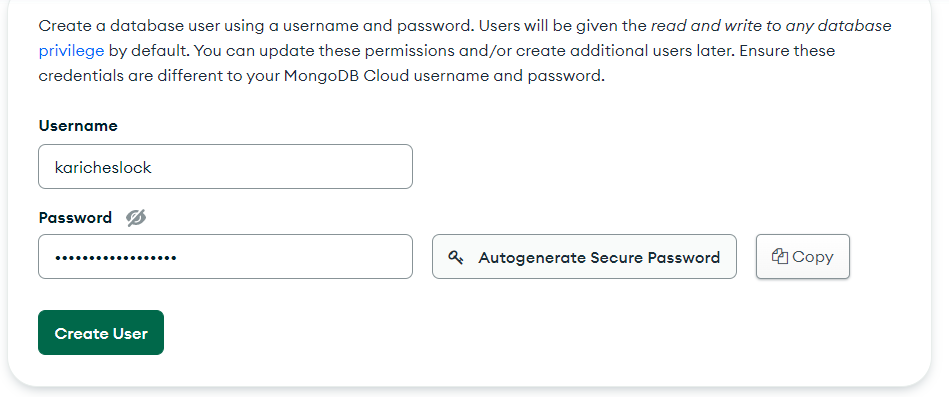
It will take 3 to 5 minutes to provision the resources for your cluster. In the meantime, you can create a username and password one the Security Quickstart page. Be sure to make a note of your password. You will need it later when we set up the database connection in the app. Click Create User when you are done.
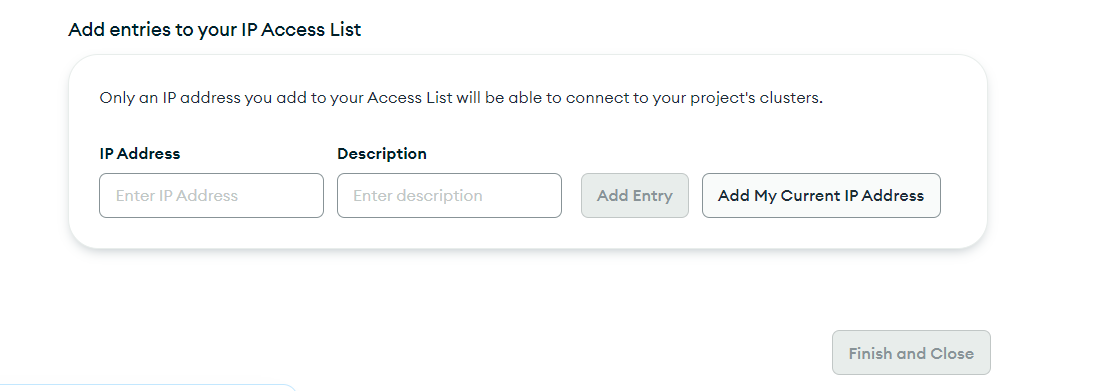
Scroll to the bottom of the screen and click Add My Current IP Address followed by Finish and Close.
Ok, that's it for now in MongoDB. Leave the window open - we'll come back to it in just a minute - and head back to VSCode.
Create a new file in your folder and call it .env.
This file will need 4 variables:
NODE_ENV = developmentPORT = 5000MONGO_URI = **This will come from your MongoDB database. See instructions below**
JWT_SECRET = mysecretcode123The NODE_ENV variable will be changed to production later when we are ready to deploy but for now we will leave it as development. Also, you can use a different port besides 5000, but this port number will work for demonstration purposes. You can also set the JWT_SECRET to a value of your choice or you can use the one above.
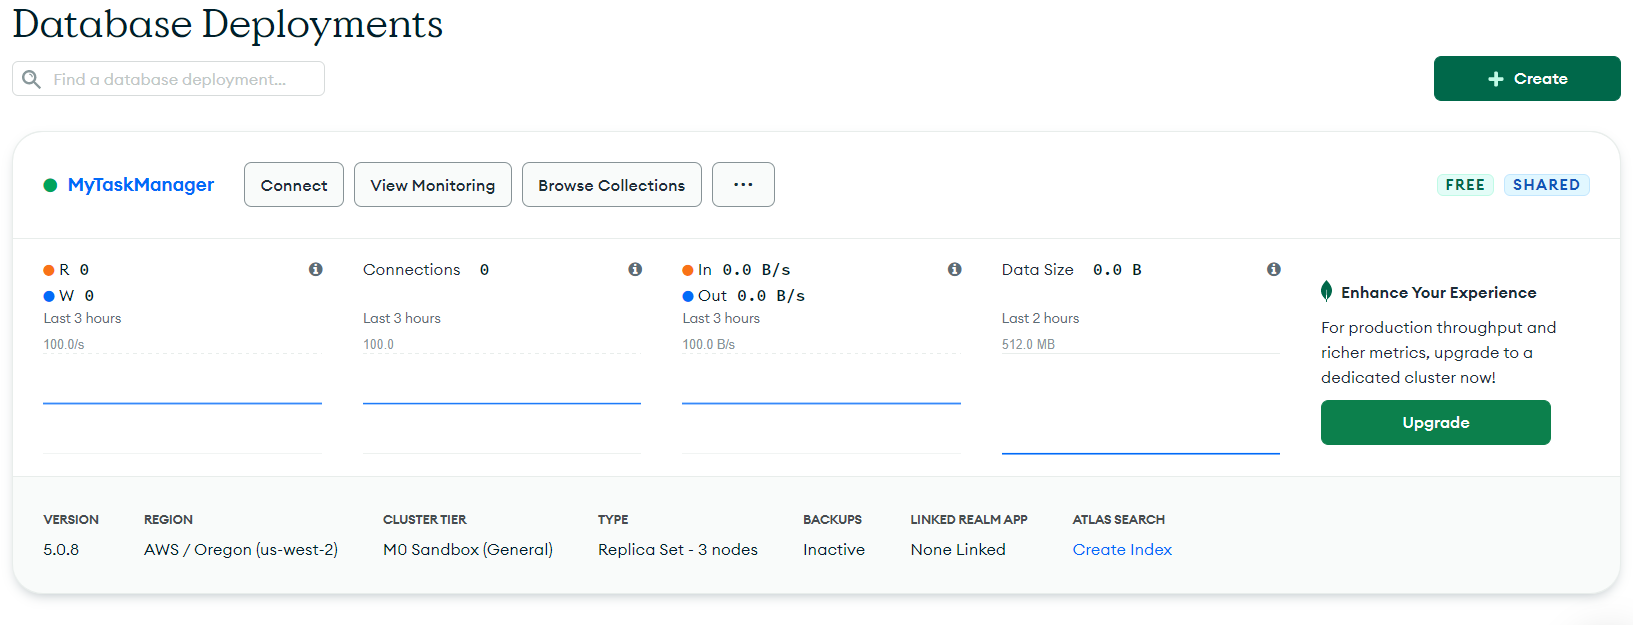
For the MONGO_URI, head back over to your MongoDB database dashboard and click on Connect.
Click on the middle option - Connect My Application. From there, you should see a screen that looks like this.
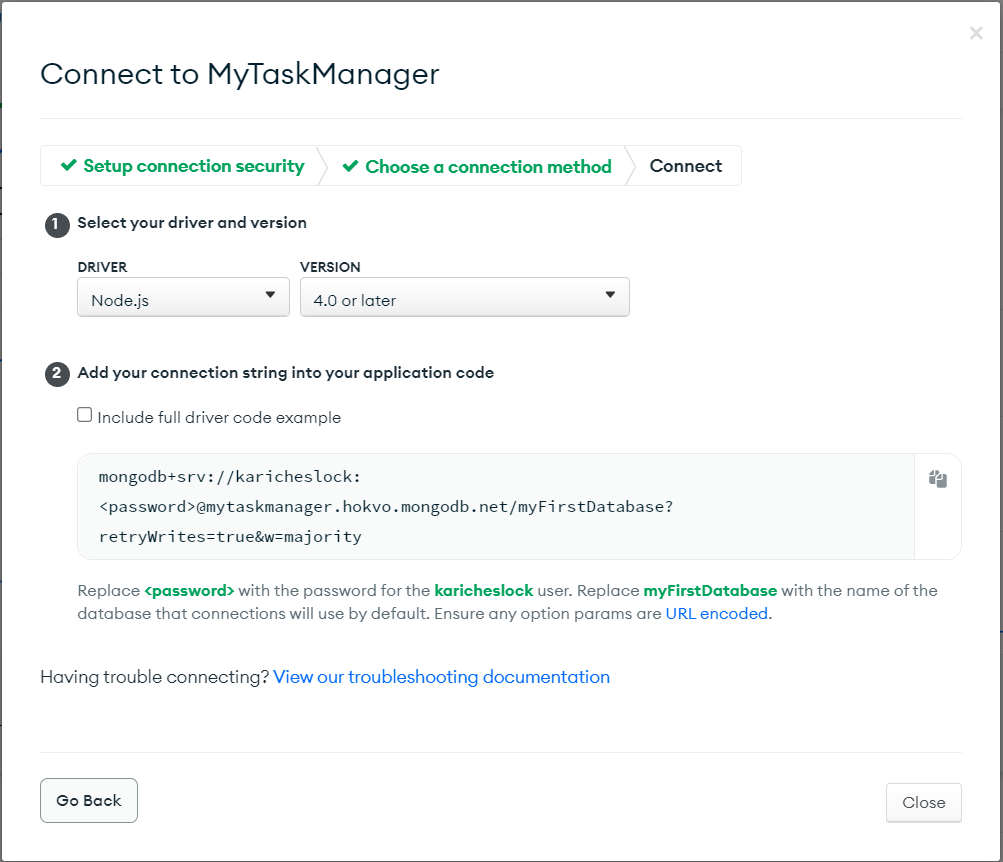
Copy the connection string from step 2 and paste it into your MONGO_URI variable in your .env file. You will need to replace <password>, including the angle brackets, with your password that you created previously. You will also need to replace myFirstDatabase with your database name.
Ok! With all of that done, we are finally ready to start writing some code. Let's start building the backend of our app.
Building the Backend
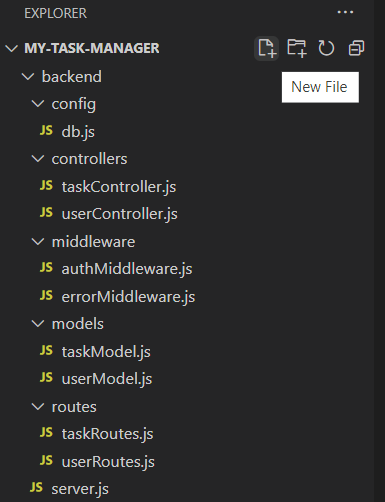
The following screenshot shows the folders and files that will be needed to create this app. Begin by creating a folder called backend. From there, you can create the folders and files as shown. Note that the server.js is in the root backend folder. You will see the Add New Folder and Add New File buttons when you hover over the project folder. Make sure you type the .js extensions on your files.
Let's start in the db.js file. The following code should go in this file. Please note that although you can copy and paste this code, you will learn a lot more if you type it out yourself and start gaining 'muscle memory' of the boiler plate code that you can reuse in other applications.
This code establishes the connection to your MongoDB database by accessing the MONGO_URI variable that you stored in your .env file.
Next we will add the code for the userModel.js and taskModel.js files, respectively. These files will establish the schema for the user and task collections in your MongoDB database. Note that we will be including timestamps for each schema. This will add fields for createdAt and updatedAt with each document.
Now we need the code for the userController.js and taskController.js files. These files will contain the functions for interacting with your MongoDB database. The userController.js file also contains code to generate a hashed password using the bcryptjs library as well as code to generate a json webtoken using the jsonwebtoken library. Note that the functions in the taskController.js file require a valid user.
The next step is to create the middleware files. The authMiddleware.js file will allow us to establish protected routes for our API endpoints. This will ensure that a single user can only access and edit their own tasks. The errorMiddleware.js file will allow us to see the error stack while we are in development.
Now that the models, controllers, and middleware are established, we can create the routes for users and tasks. The following code will go in the userRoutes.js andtaskRoutes.js files, respectively.
The last step to building out the backend is to add the code for the server.js file. This file will use the routes we created to connect to the database.
Note that you can comment out the code black labelled 'Serve frontend for production' if it causes you any problems while you are still in development. Just remeber to uncomment it when you are preparing for deployment.
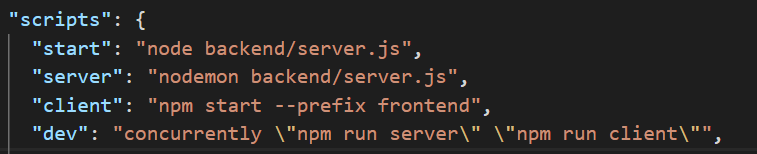
Now we need to add a couple of scripts to our package.json file to run our server.

The 'start' script will start the server using node. The 'server' script will start the server using nodemon. Nodemon is useful during development because it will detect any file changes and automatically restart the server. Running either script should show something similar to this in the terminal.

At this point, it is advisable to test your API endpoints using a program like Postman or Insomnia. Postman has a nice tutorial on their website. Note that you will need to include the json webtoken in the authorization when you are testing your endpoints since we set up the routes to be protected.
And that's it for the backend! Time to build out the UI.
Building the Frontend
For this app, we will be using Create React App, the Redux Toolkit and TailwindCSS.
To start, head back to the terminal in VSCode and type npx create-react-app frontend --template redux. This will generate several template files for the app, some of which we will use and some we will delete. But first things first, we need to install some dependencies.
Begin by changing into the frontend folder by typing in cd frontend.
From here you can install the needed dependencies by typing the following:
npm install axios date-fns react-icons react-router-dom react-toastify tailwindcssNext, there are a couple more housekeeping things to do for TailwindCSS.
In the terminal type npx tailwindcss init.
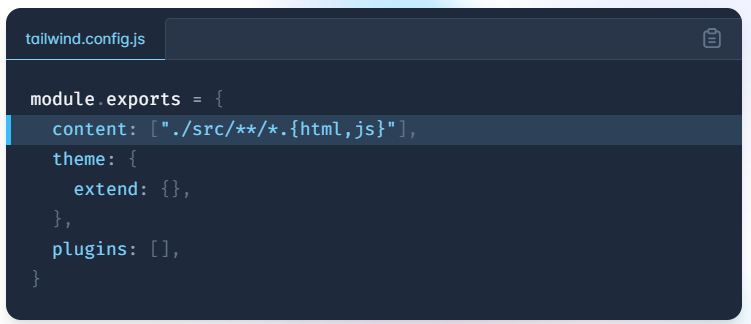
This will generate a file called tailwind.config.js that needs to be modified as shown below.
You can also copy and paste this from the TailwindCSS installation page.
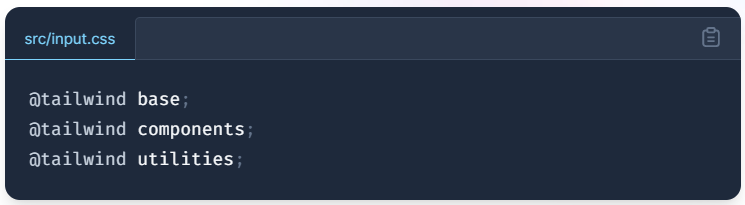
Finally, you need to go in the index.css file that was autogenerated and add the code shown below. This can also be copied and pasted from the TailwindCSS installation page.
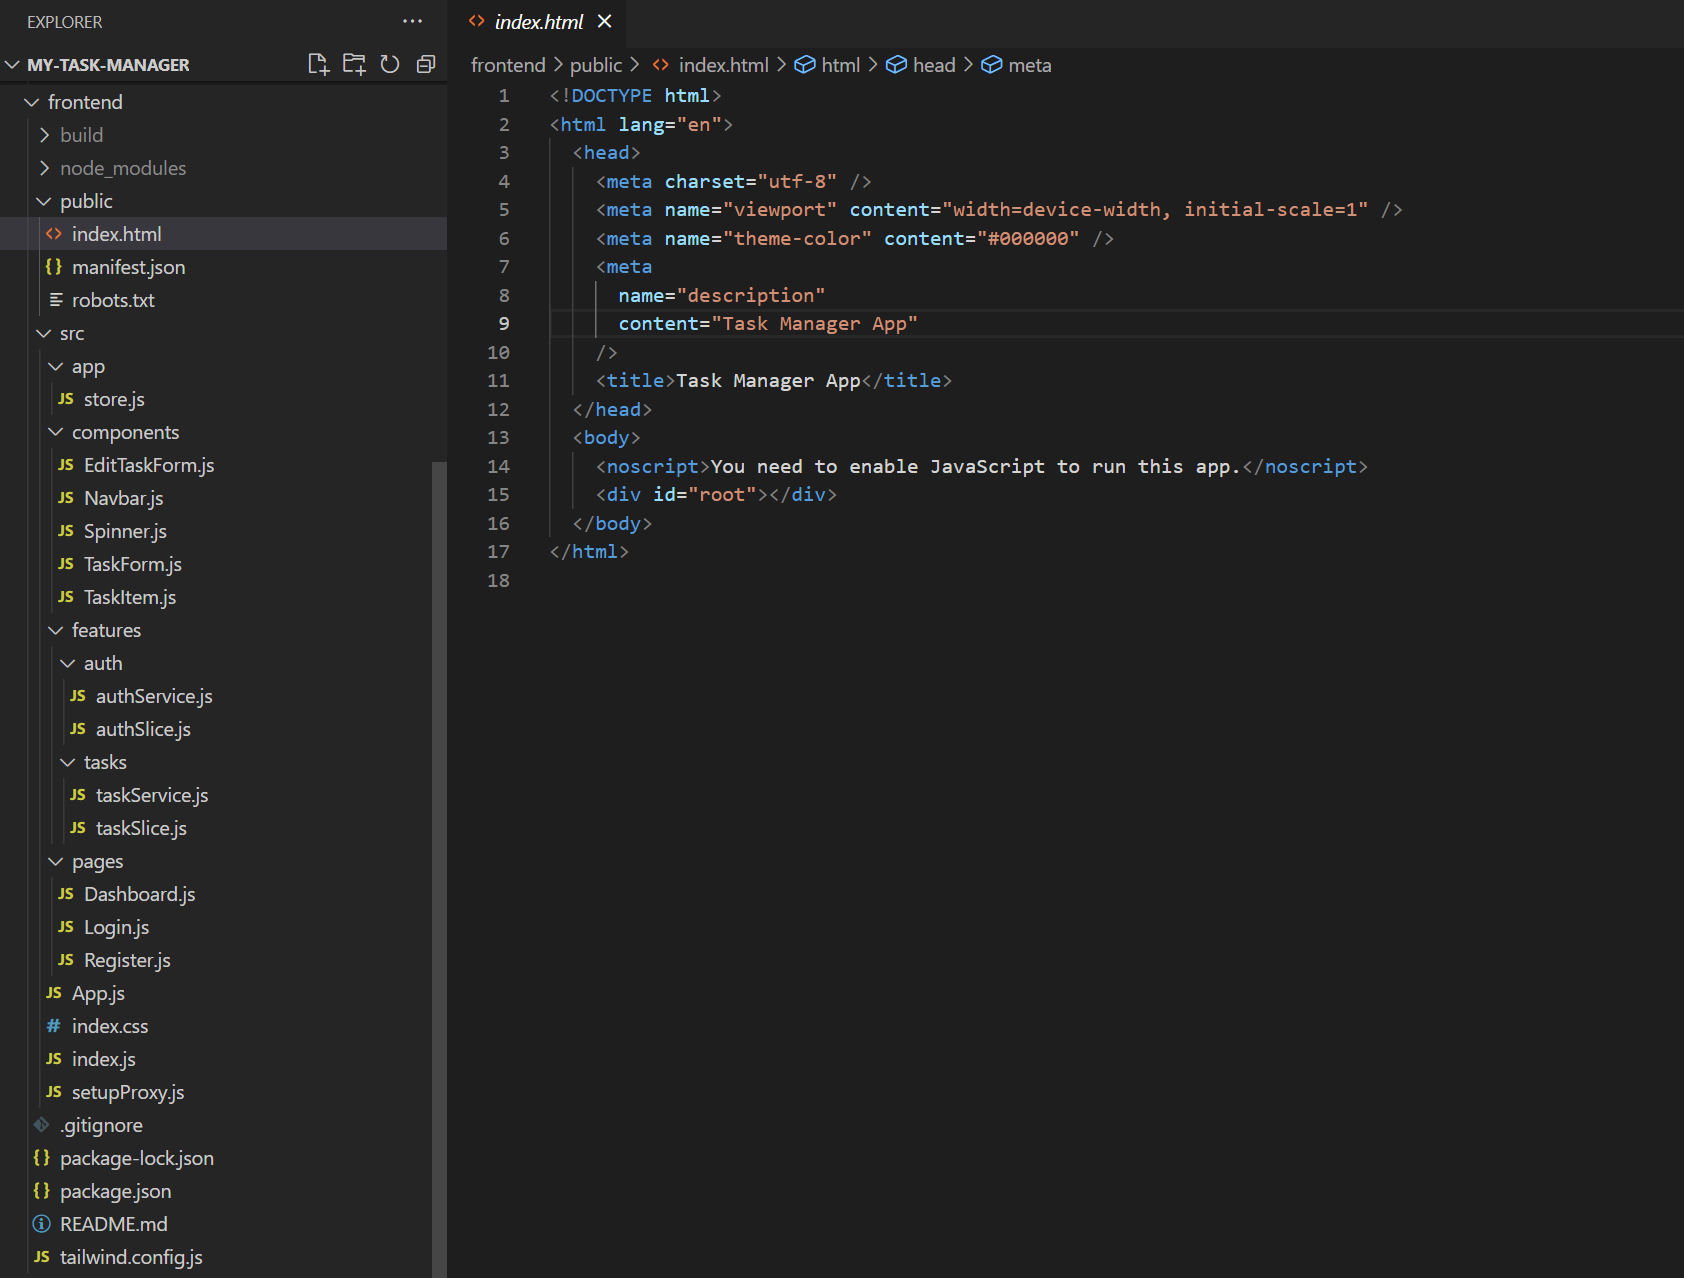
The following screenshot shows the file tree and cleaned up index.html file for the frontend of this project. Any files not shown can be deleted. You can ignore the build folder for now. That will be generated when we are ready to go to production.
Please view the source code if you need to verify any file names.
The first file we will code will be the setupProxy.js file. This file will create a proxy for the frontend to communicate with the backend.
Next, we need to go back to the package.json file in the root folder of the project and add two more scripts. Make sure you are adding the scripts to the same package.json file that you modified earlier and not the new one generated by create-react-app.
Now when we are testing our app in development we can run npm run dev to launch the application. This will load the frontend while also running the backend using nodemon.
The Redux Store
Our next step is to build the redux store using the redux toolkit. For those of you who are not familiar with redux, it is a library that allows you to maintain your state globally. This gives you access to your state across multiple components without having to recreate your state each time. While it seems like more code at first, it's actually a way to make your code more portable and reusable.
For this part of the application, we will focus on the files in the features folder and then we will use those files to build the redux store.
Note that in the authService.js and taskService.js files, we will be using axios to set up our APIs to communicate with the backend.
Also note that in the authSlice.js and taskSlice.js files, we will be using the createSlice and createAsyncThunk functions to set up our reducers and our asynchronous functions. These functions are really the heart of the redux tookit because they let you manage and monitor how your state is changing. The code for these files is shown below.
Now we just need to add our reducers to the store.js file in the app folder and our global state will be complete.
Building the Pages and Components
We are finally ready to build the pages for our application. But first, we will set up the routes we will need in the App.js file as shown below. Note that we will need the task id from the database for theedit-task route.
Now we will move on to the components folder, starting with the Spinner.js component. This is a simple spinner that the user will see any time a page is loading.
The styling for this component will go in the index.css file. This will be the only component that will be styled in the index.css file. The remaining components will be styled using TailwindCSS classes.
And now we just need to import this styling into our spinner component.
Now we will build the navbar component that will be at the top of each page. Note that we will be using some React icons to add style to the page. We will also be using the useSelector anduseDispatch functions from the redux toolkit to access our global state and global functions we created. We will also be using the logout andreset functions from our authSlice.js file.
Next we need our three components to create, edit, and display our task items on the dashboard. The code below will be for the TaskForm.js, EditTaskForm.js andTaskItem.js components.
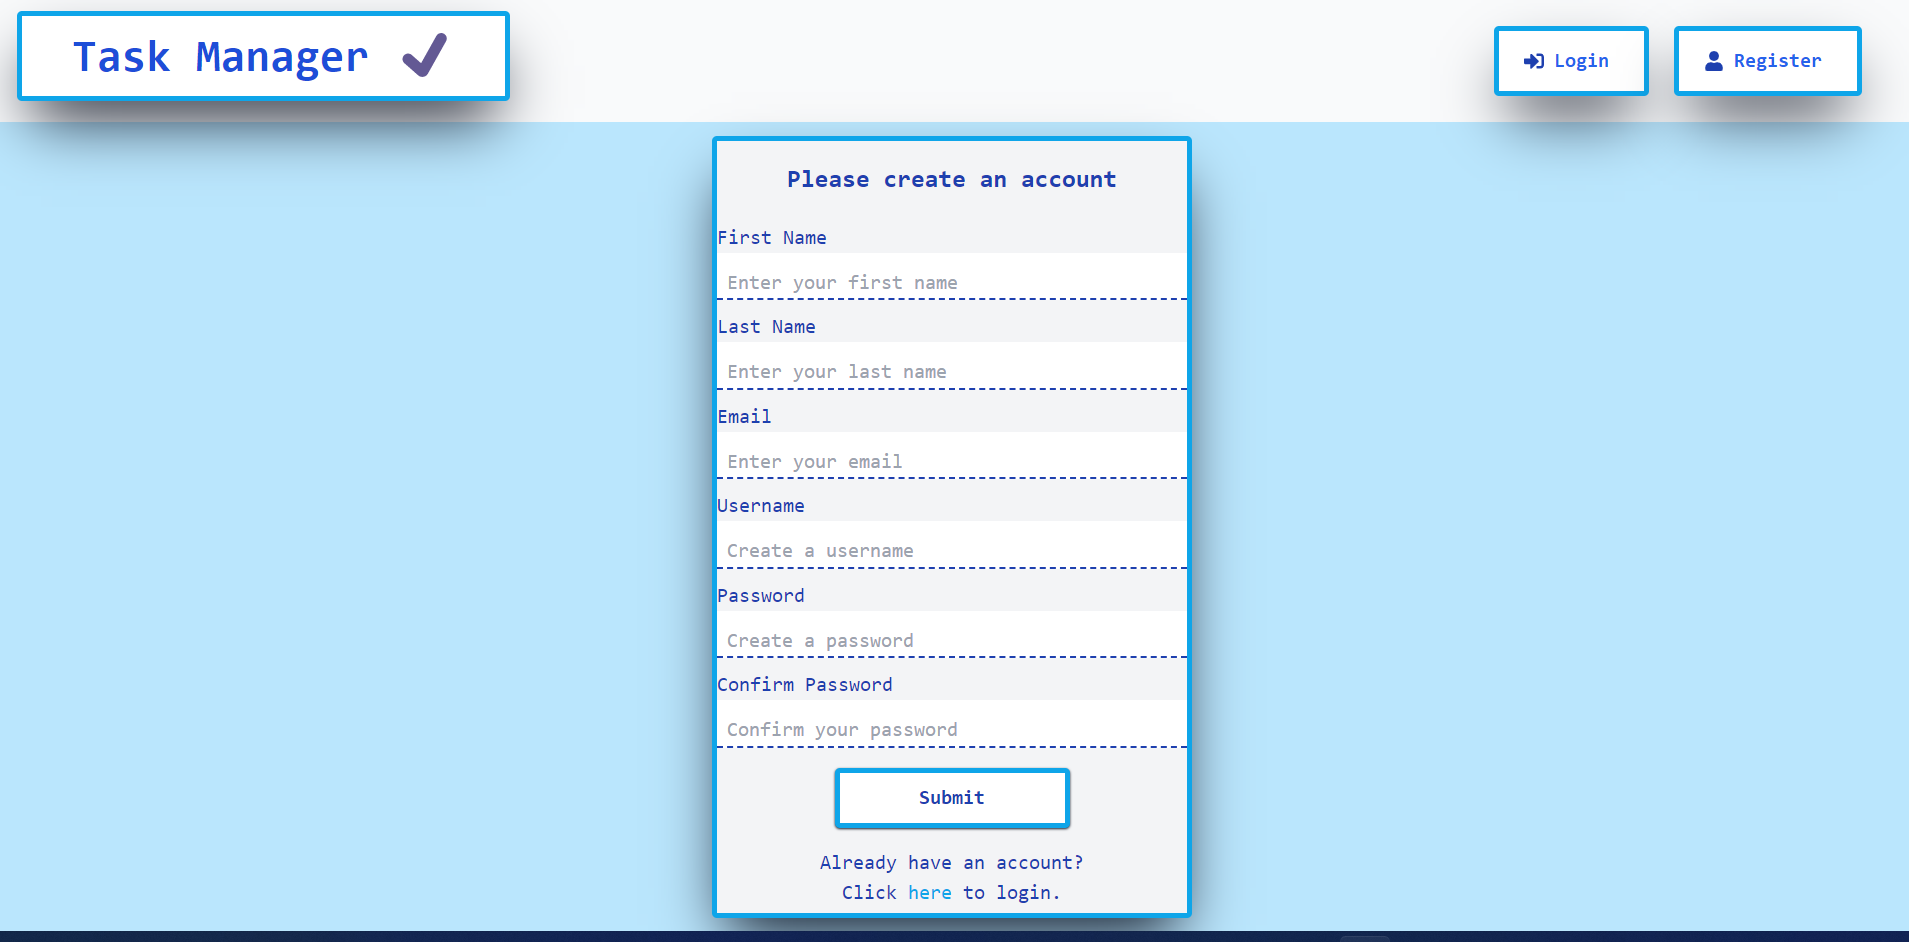
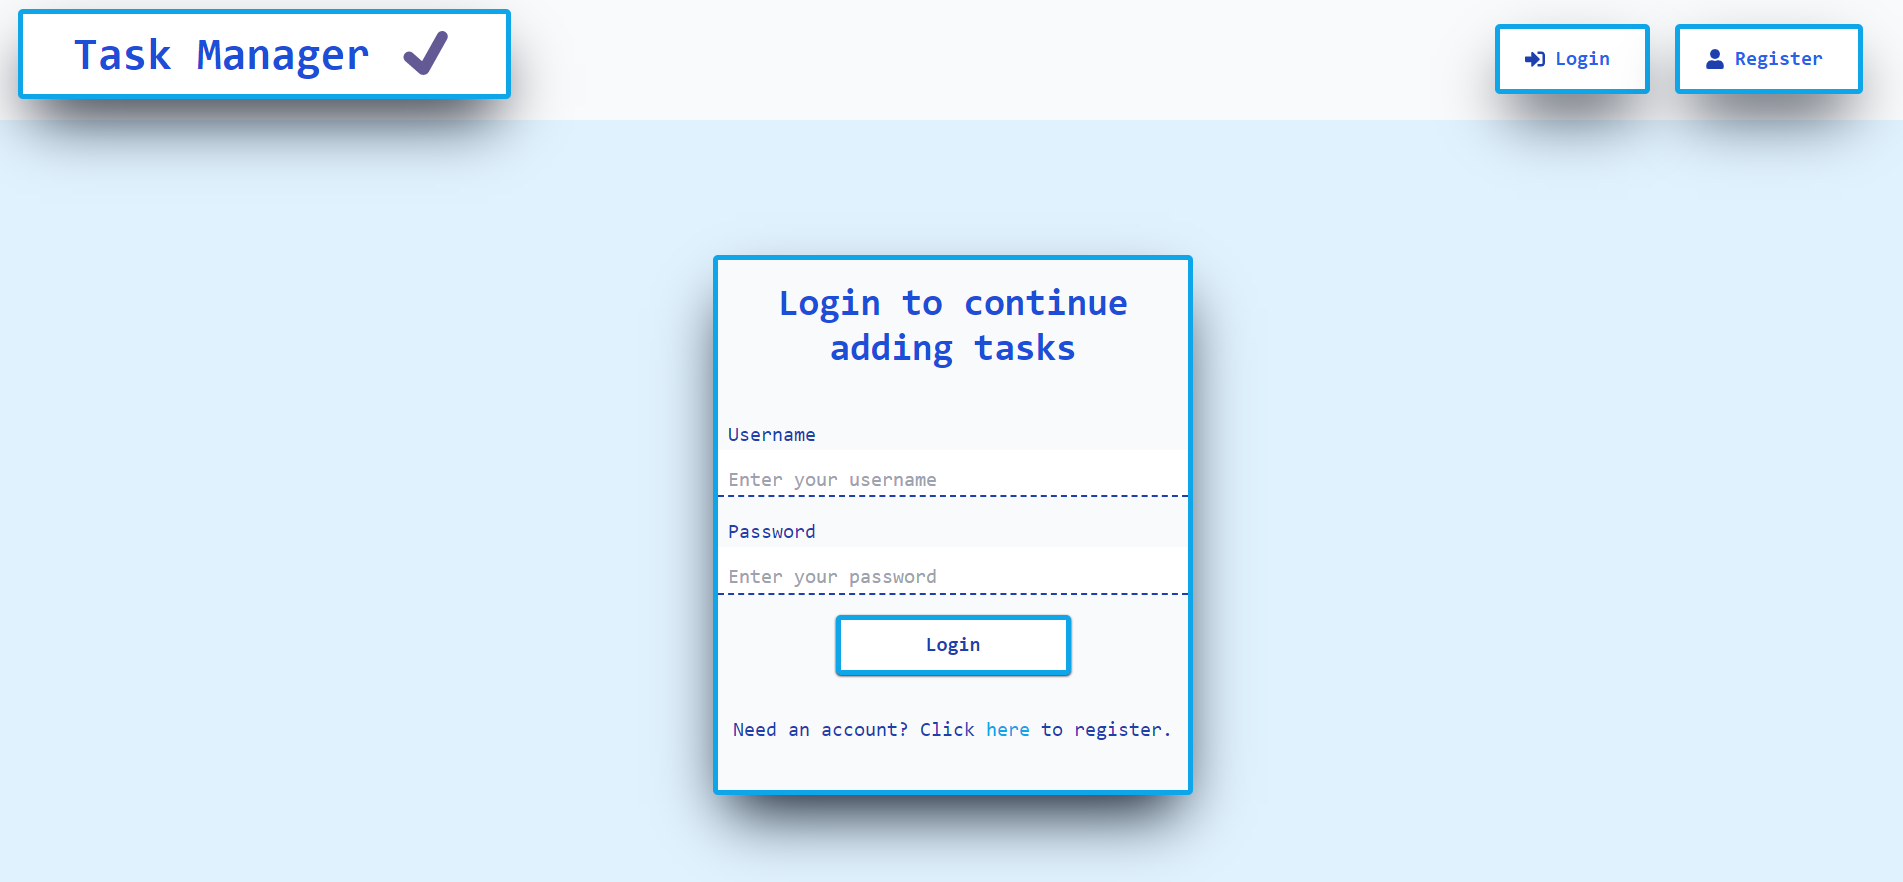
Finally, we just need our three main pages and we're done! The following code is for the Dashboard.js, Register.js and Login.js files.
🎉 All Done! 🎉
And that's it! You should now be able to run the command npm run dev and see the completed application. Take a few minutes to celebrate a finished project and then we will deploy to Heroku.
Register Page
Login Page
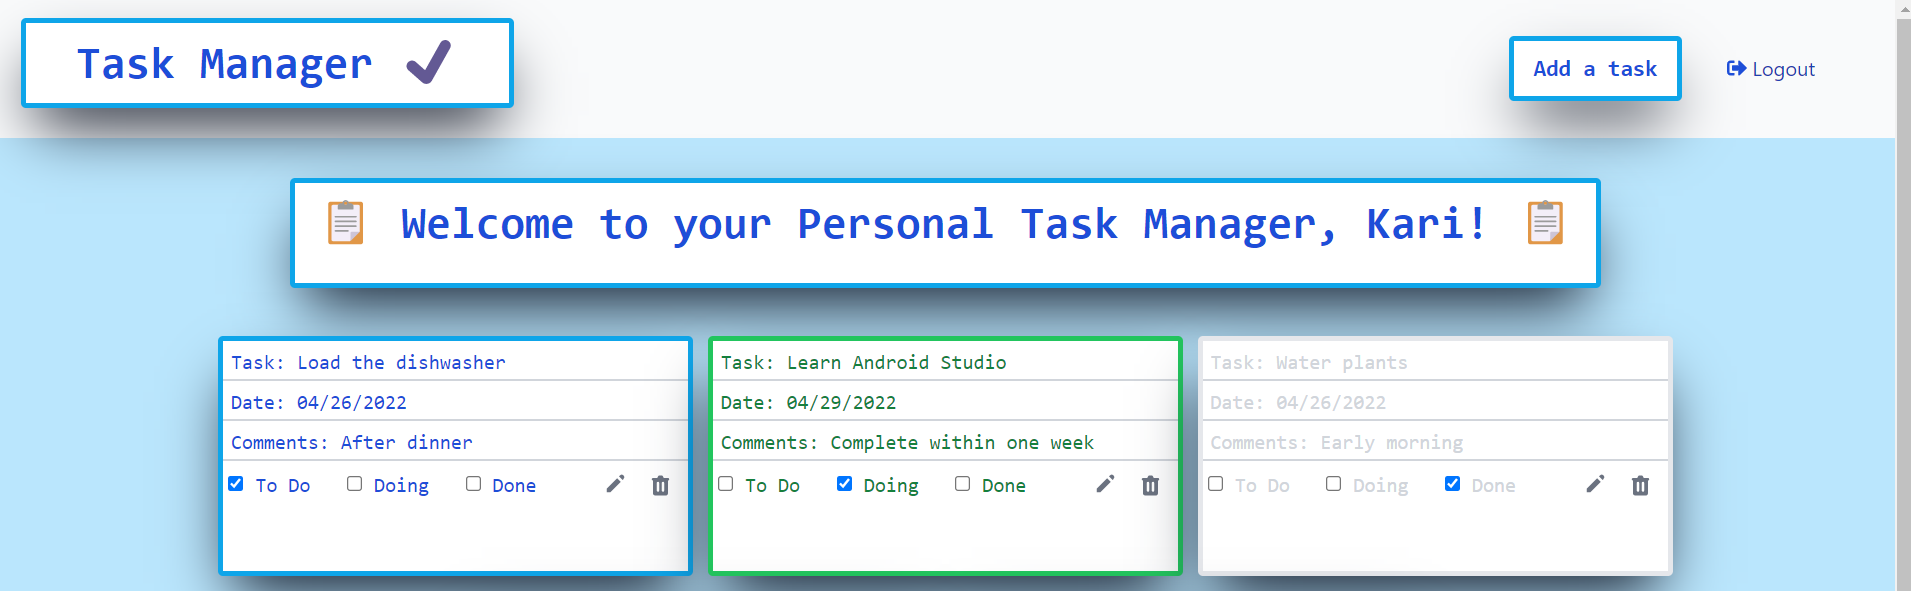
Dashboard
Note that the tasks are conditionally rendered based on which checkbox is checked for To Do, Doing, or Done. However, this is only happening in the frontend and won't save when the user refreshes the screen.
A challenge for you will be to add these conditions to the database so that they will save for the user. Of course, I will be adding this functionality in a future post, but for now, you can try it for yourself.
Hint: These will have to be Boolean values.
Deployment
There are a few housekeeping things we need to do before we can deploy.
The first thing we need to do is go to our MongoDB database and change the access to it.
From your database dashboard page, click on Network Access on the left. This should take you to a screen that shows your IP address. Click Edit and then you should see a screen that looks like this.
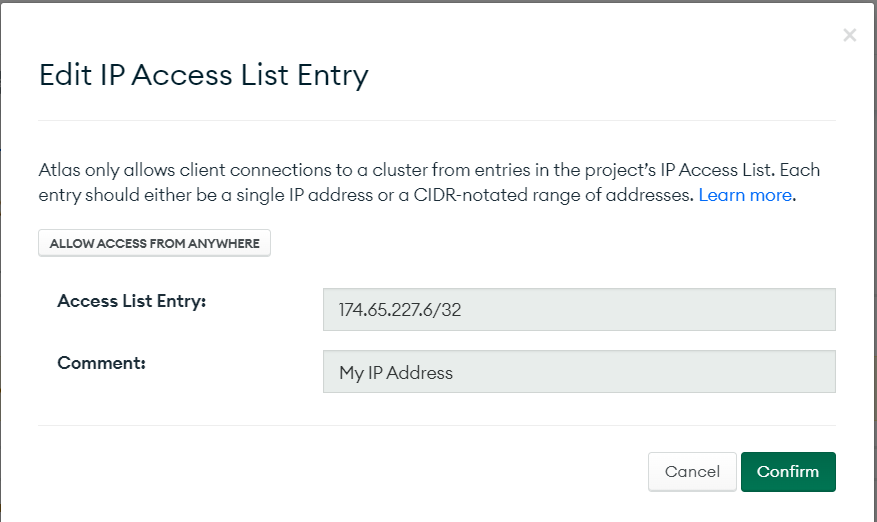
Click ALLOW ACCESS FROM ANYWHERE and confirm the change.
Next, we need to go back to our .env file and change our NODE_ENV variable to production.
You also need to uncomment the code to serve the frontend in the server.js file if you commented it out previously.
Now you need to go to the Heroku website and sign up for an account. It's free.
You will also need to download the Heroku CLI. Note that if you have been using Windows PowerShell, you will need to run Heroku from the command line instead.
Launch the command line and change into your project's directory.
Type heroku login. This will launch a browser window where you can login to your Heroku account. After logging in, you can close the browser window and return to the command prompt. You should see a message that you are logged in.
Now type heroku create <my-unique-app-name> at the command prompt, replacing the text in angle brackets with your app name. Do not type the angle brackets. Note that this name will need to be entirely unique across all website names so you should do something like add your name or a number string to it to ensure uniqueness.
After the app has been created, go back to your Heroku dashboard, click on your new app name and click on the Settings tab. From here, you will click on Reveal Config Vars. This is where we will load our environment variables.
You only need to add JWT_SECRET, MONGO_URI and NODE_ENV variables. You do not need to add PORT.

Now go to the deploy tab. Look under the section labelled Deploy Your Changes and look for the line of code that begins $git remote ...
Copy this line of code and go back to your command line, but don't paste it yet.
Type git add . including the dot at the end and hit enter.
Type git commit -m "Production build" or whatever commit message you want and hit enter.
Now paste the $git remote ... command you got from Heroku and hit enter.
Now type git push heroku main and hit enter. If you deployed to master instead of main, type git push heroku master and hit enter.
Finally, you can type type heroku open to launch your app.
🎉 Time for Another Celebration! 🎉
Having a fully deployed application is a huge achievement, and you should be very proud of yourself if you made it this far. This was a big project with a lot of steps, so if you got it working you should give yourself a huge self high-five ✋👏.
So that's it! I hope you had fun learning the MERN Stack. Please comment below 👇 or send me a message 📨 if you liked what I had to say. You can also connect with me on LinkedIn .
Also, don't forget to Subscribe to this blog to receive future updates!
Happy Coding!
Kari
Sign in with Google to add a comment
Comments